You’ve got a photo you love, but something feels...off. Maybe the background looks dull, distracting, or just doesn’t fit your vision. That’s where Photoshop comes in.
Changing or filling a background might sound like an advanced Photoshop move, but it’s actually one of the most useful (and surprisingly approachable) editing skills you can learn. Whether you’re cleaning up a product photo, removing distractions, or just experimenting creatively, background fills can completely transform an image.
This beginner-friendly guide walks you through how to fill background in Photoshop step by step. We’ll cover multiple methods – from solid color fills to Content-Aware Fill – plus tips for cleaner results and creative upgrades with ready-made backgrounds from Zedge.net.
Why You Might Need to Fill a Background in Photoshop
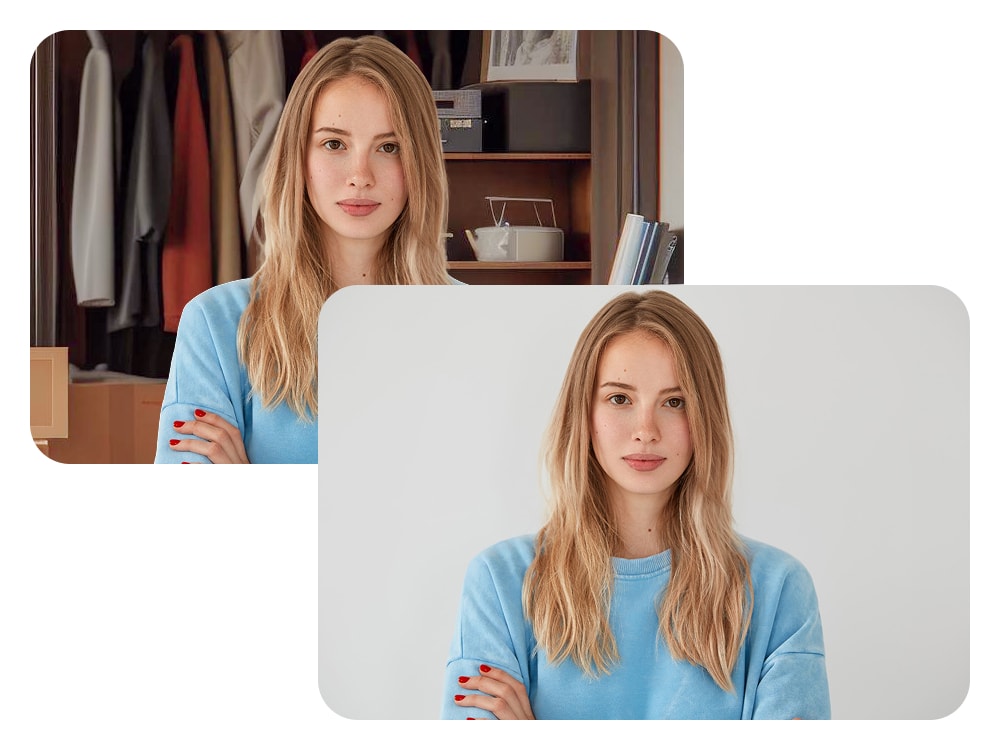
Sometimes the photo itself is perfect, but the background? Not so much. Filling or replacing a background can make a huge difference in how polished and professional your image looks.
Common Scenarios for Changing Backgrounds
- Cleaning up portraits where the background layer is cluttered
- Removing unwanted elements like wires, signs, or random people
- Adjusting product shots to a solid color for e-commerce
- Creating consistency across multiple images for branding
- Adding a creative flair with textures, gradients, or custom backgrounds
Preparing Your Photoshop Project
Before you start editing, make sure your image file is set up correctly.
Opening and Setting Up Your File
- Launch Adobe Photoshop.
- Open your photo by going to File > Open.
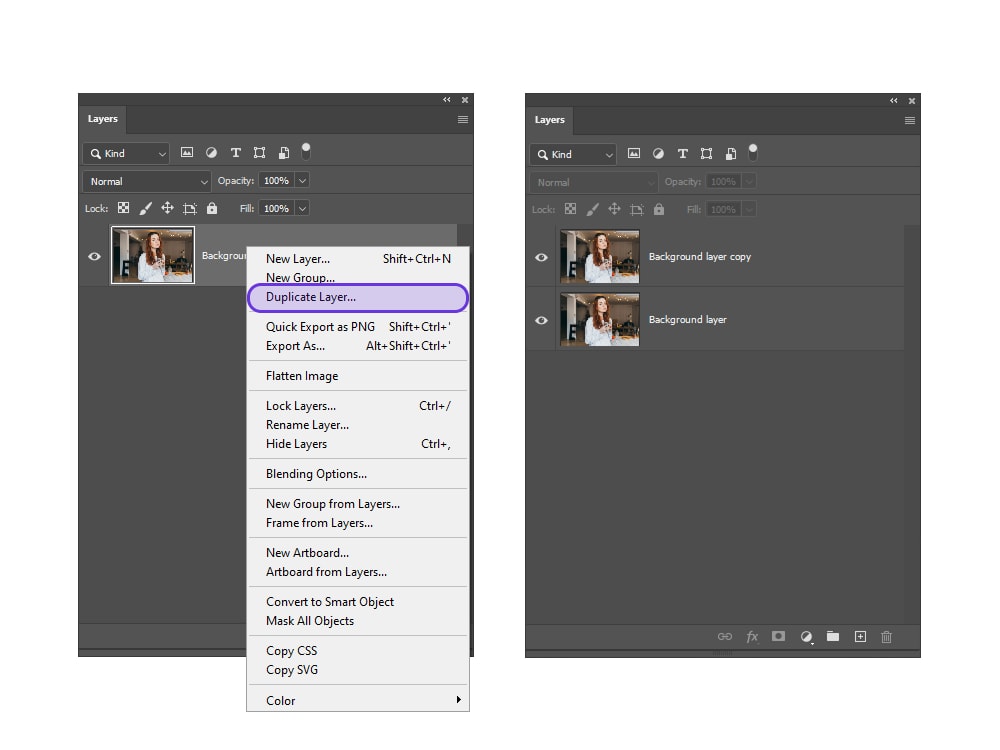
- In the Layers Panel, check that your background layer is unlocked. If it’s locked, click the padlock icon to unlock it.
- It’s always smart to work non-destructively – so duplicate the layer before making changes. Right-click the background layer and select Duplicate Layer.
Method 1: Filling the Background with a Solid Color
This is the simplest approach when you just want a clean, consistent background.
Using the Fill Tool
- Select the background layer in the Layers Panel.
- Use a selection tool (like the Quick Selection Tool or Lasso Tool) to isolate the subject.
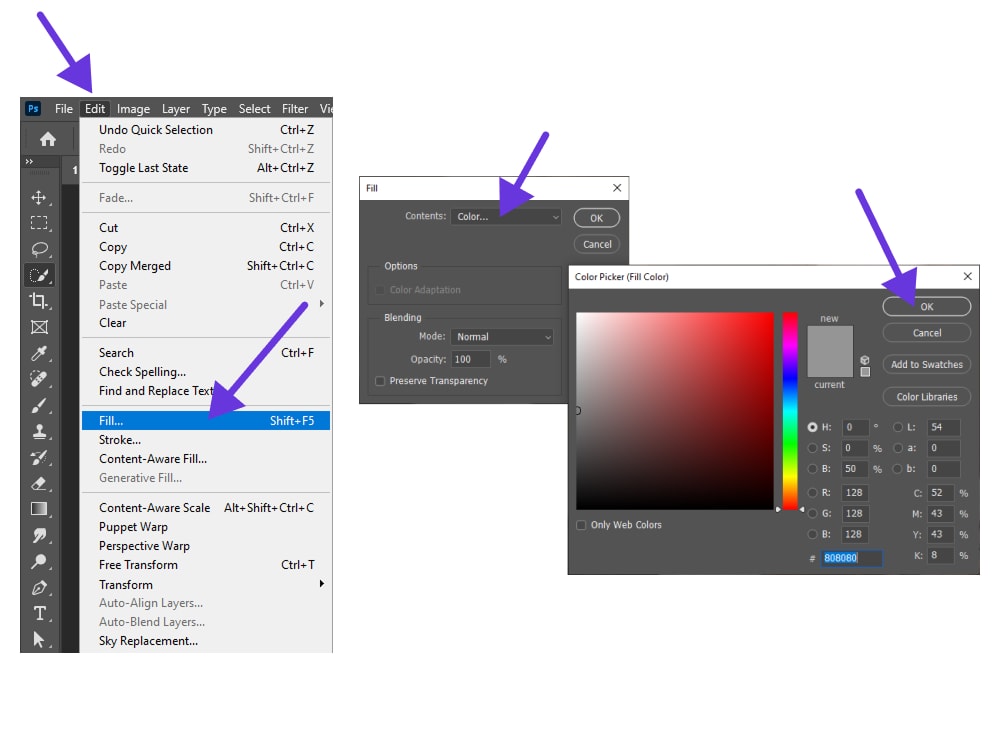
- Go to Edit > Fill.
- In the dialog box, choose Solid Color and pick your desired shade.
- Press Enter to apply.
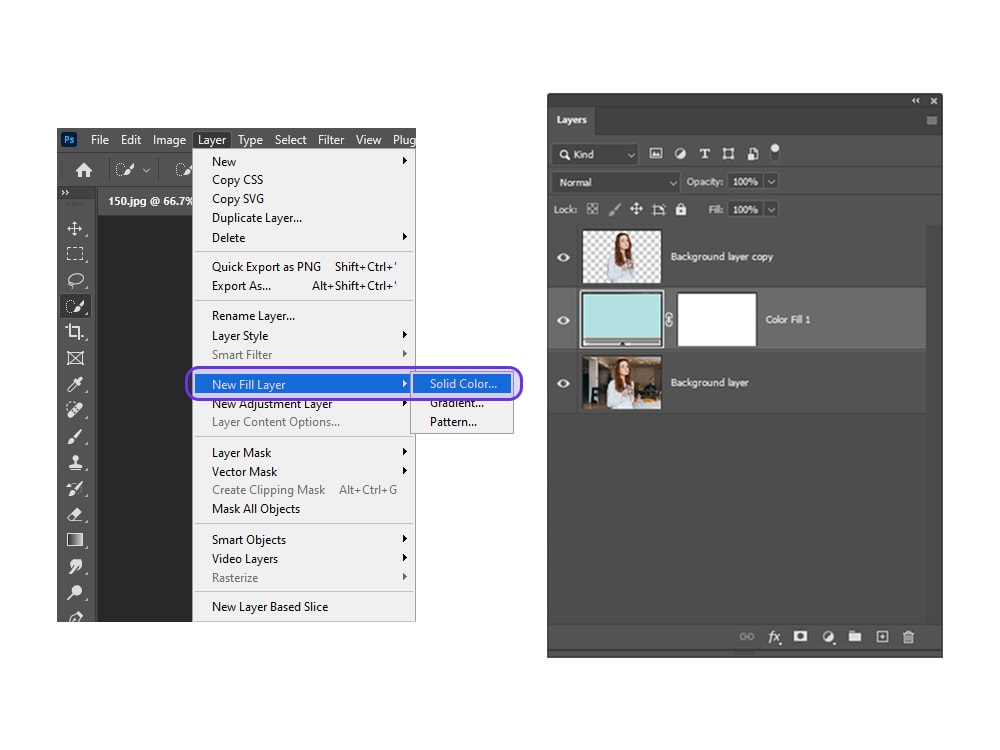
Creating a Solid Color Fill Layer
For more flexibility:
- Go to Layer > New Fill Layer > Solid Color.
- Choose a color.
- Place this new layer below your subject in the Layers Panel.
- Adjust using the Options Bar or Blending Modes for a softer effect.
Method 2: Using Content-Aware Fill to Replace Backgrounds
When you want Photoshop to intelligently remove and replace parts of your background, Content-Aware Fill is your go-to.
When to Use Content-Aware Fill
- Removing unwanted elements (like photo bombers)
- Expanding an image background seamlessly
- Replacing textures while keeping lighting realistic
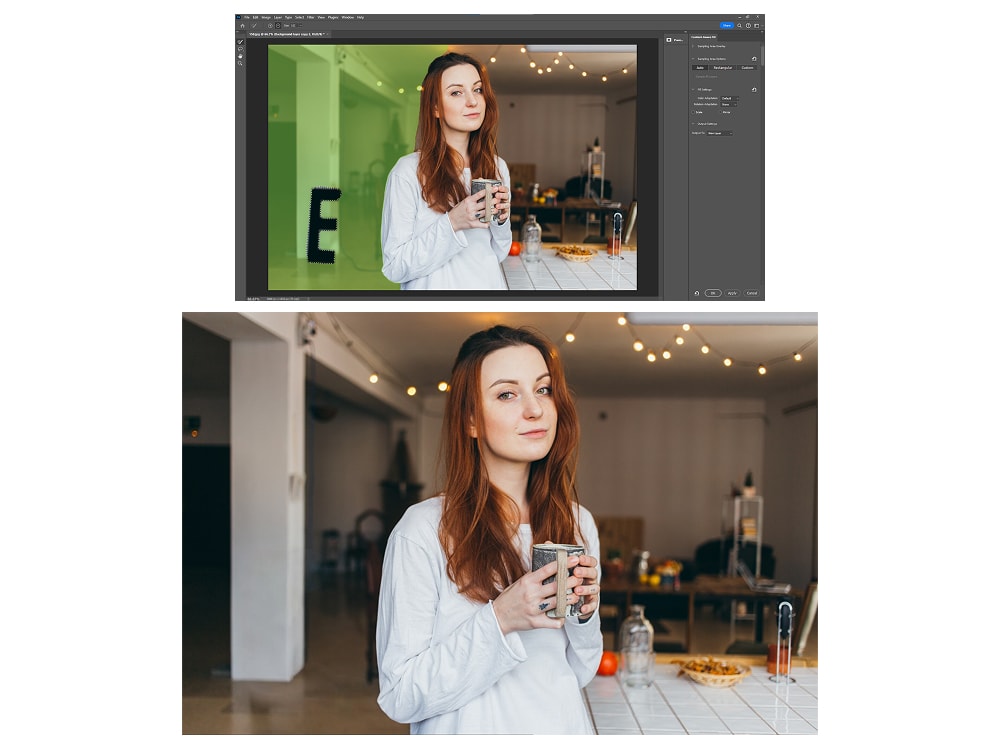
How to Apply Content-Aware Fill
- Select the Lasso Tool or Quick Selection Tool and outline the area you want gone.
- Go to Edit > Content-Aware Fill.
- The Content-Aware Fill Panel (sometimes called the Aware Fill Panel) will open.
- Photoshop auto-selects a sampling area, but you can adjust it with the Brush Tool.
- Preview your changes, then click OK to apply content aware fill.
Method 3: Setting a Custom Background Color
Sometimes you want a specific new background color – not just plain white.
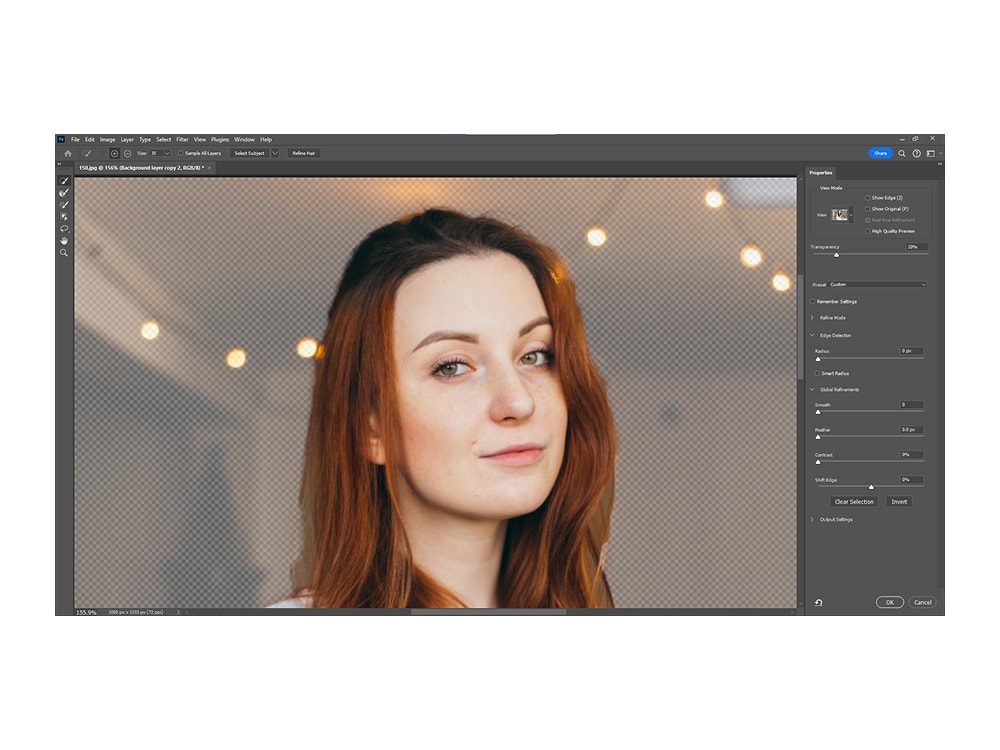
Isolating the Subject
- Use the Object Selection Tool or Quick Selection Tool to select your subject.
- Refine the edges for a smooth cut-out using Select and Mask.
Refining Edges for a Clean Selection
- Zoom in and use the Brush Tool to fine tune tricky areas like hair.
- Turn on Color Adaptation if needed to smooth transitions.
- Once satisfied, create a new layer filled with your chosen color.
💡 Tips for a Seamless Background Fill
- Undo mistakes easily with Ctrl+Z or Edit > Undo.
- Use adjustment layers to fine tune colors until they look natural.
- If you’re working with multiple images, keep your solid color consistent for a professional look.
- Try blending modes for more creative results.

Improve Your Designs: Creative Backgrounds with Zedge
Solid colors are clean, but sometimes your design calls for something with more personality. That’s where Zedge comes in.
👉 Finding Stunning Backgrounds on Zedge
From minimalist gradients to bold patterns, Zedge has thousands of wallpapers and backgrounds you can use in your designs. Browse Zedge Wallpapers to find one that fits your style.
How to Import and Use Zedge Backgrounds in Photoshop
- Download a background you love from Zedge.
- Open your project in Photoshop.
- Drag the background image file into Photoshop as a new layer.
- Resize and adjust using the Options Bar until it fits perfectly.

Wrapping It Up
Learning how to fill and adjust backgrounds in Photoshop opens up a world of creative possibilities. Whether you’re using a quick solid color, experimenting with Content-Aware Fill, or layering in a design from Zedge, the key is practice and exploration.
With a little patience – and the right tools – your edits will look clean, professional, and full of personality.
FAQs
How do I fill the background layer with a color in Photoshop?
Use Edit > Fill or create a Solid Color Fill Layer for more control.
What is Content-Aware Fill and when should I use it?
It’s a Photoshop tool that replaces unwanted elements or backgrounds by blending in surrounding pixels. Use it for removing distractions or expanding a background.
Can I change the background color without affecting the subject?
Yes — select your subject with a selection tool, refine the edges, and fill or add a new background layer behind it.
How do I undo a background fill if I make a mistake?
Press Ctrl+Z or go to Edit > Undo. You can also work non-destructively by using new layers instead of editing the original background layer.